
Connect Oracle Cloud
A one-time setup that gives Flomation its own scoped credential inside your Oracle Cloud tenancy, so your flows can run against OCI. It takes a few minutes, and you never paste a key.
00Overview
What the connection is, and what running it creates in your tenancy.
Running the stack creates a dedicated automation user in your tenancy with a policy you control, and uploads a key that Flomation generates and keeps. You stay in control: scope it to a single compartment or your whole tenancy, and revoke it any time by deleting the user.
Flomation never sees your Oracle password or any personal key. The private half of the signing key stays inside Flomation; only the public key is uploaded to the user the stack creates. The same credential works across every Oracle Cloud node — there is nothing per-service to configure.
01Start in Flomation
Kick the connection off from your environment’s credentials. Flomation mints the keypair — you only supply your tenancy’s public identifiers.
-
Start a new connection
In Flomation, open your Environment, go to the Credentials tab, click Add, and choose Oracle Cloud (API key).
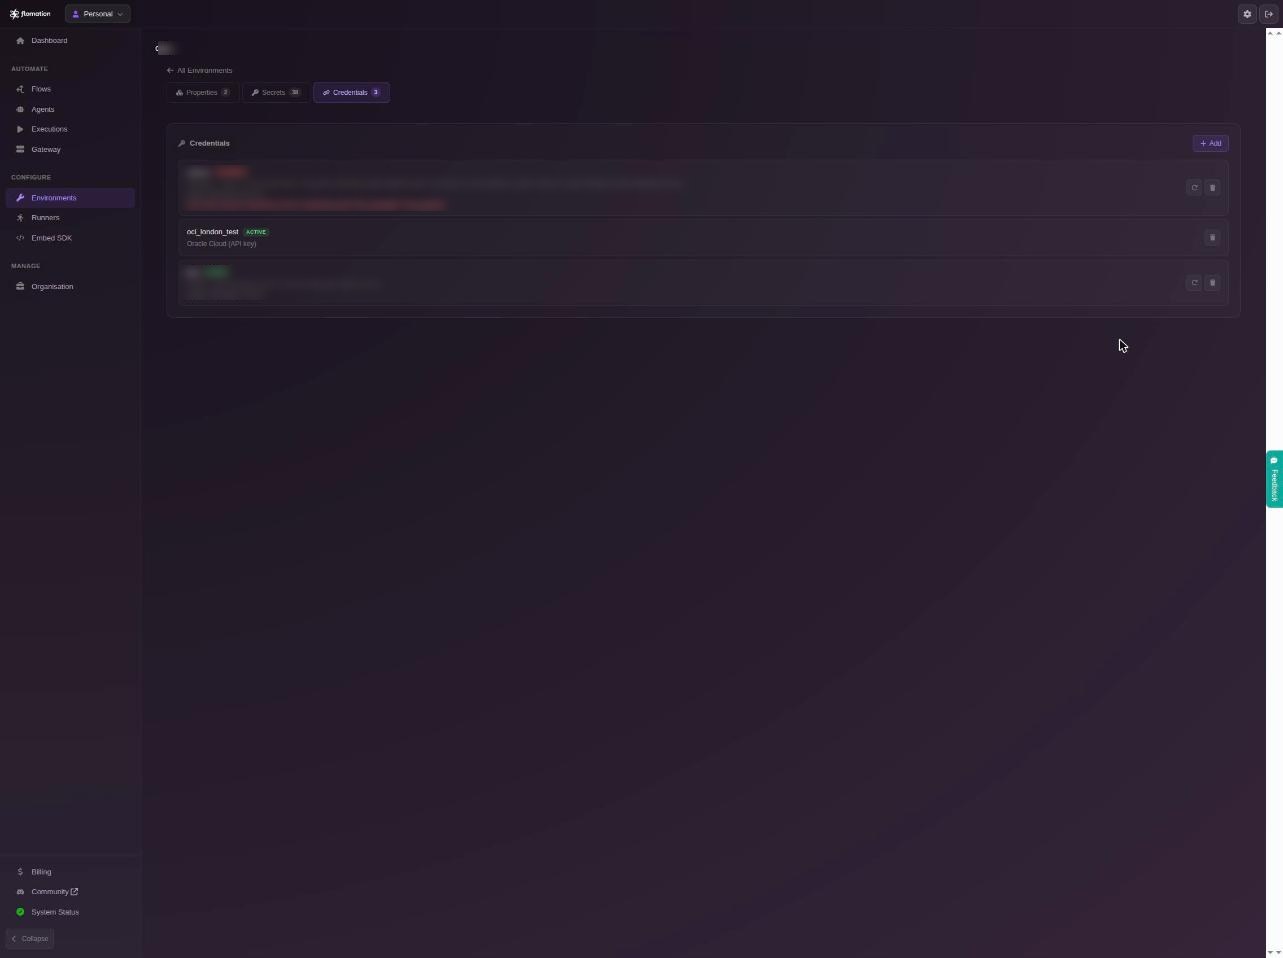
Environment ▸ Credentials ▸ Add -
Enter your tenancy details
Give the connection a name, paste your Tenancy OCID — in the OCI console this is under Profile menu → your tenancy → Copy OCID — and your home region, then click Create. Flomation generates a dedicated keypair for you, so you never handle a private key.
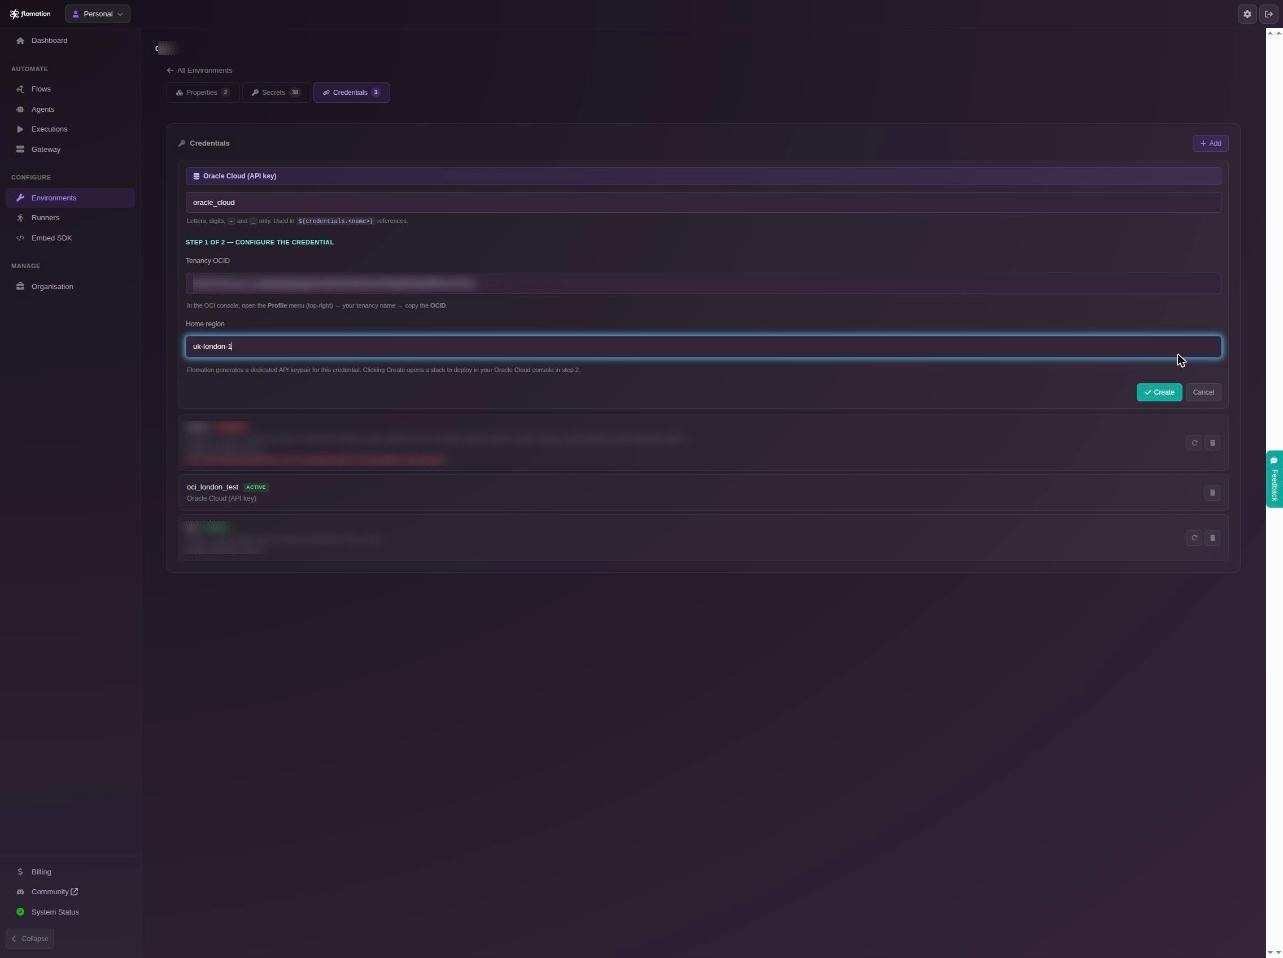
New Oracle Cloud connection
02Deploy the stack in Oracle Cloud
The “Deploy to Oracle Cloud” button hands OCI a ready-made Resource Manager stack. Running it creates the automation user, group, policy and API key — no manual IAM.
-
Open the one-click stack
Click Deploy to Oracle Cloud. This opens the Create Stack page in your OCI console, pre-filled with everything it needs.
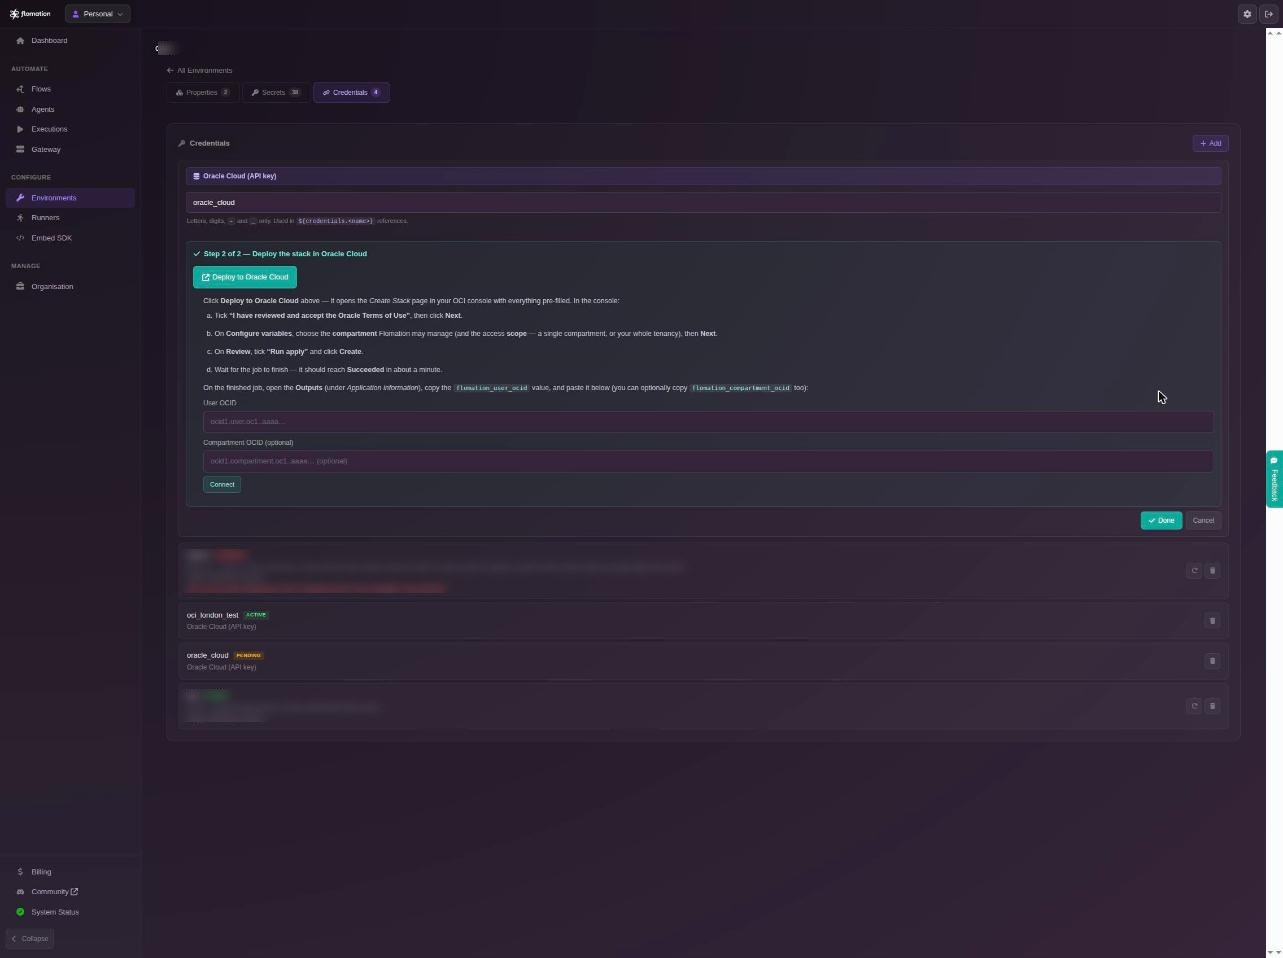
OCI console ▸ Create Stack -
Accept the terms
Tick “I have reviewed and accept the Oracle Terms of Use”, then click Next.
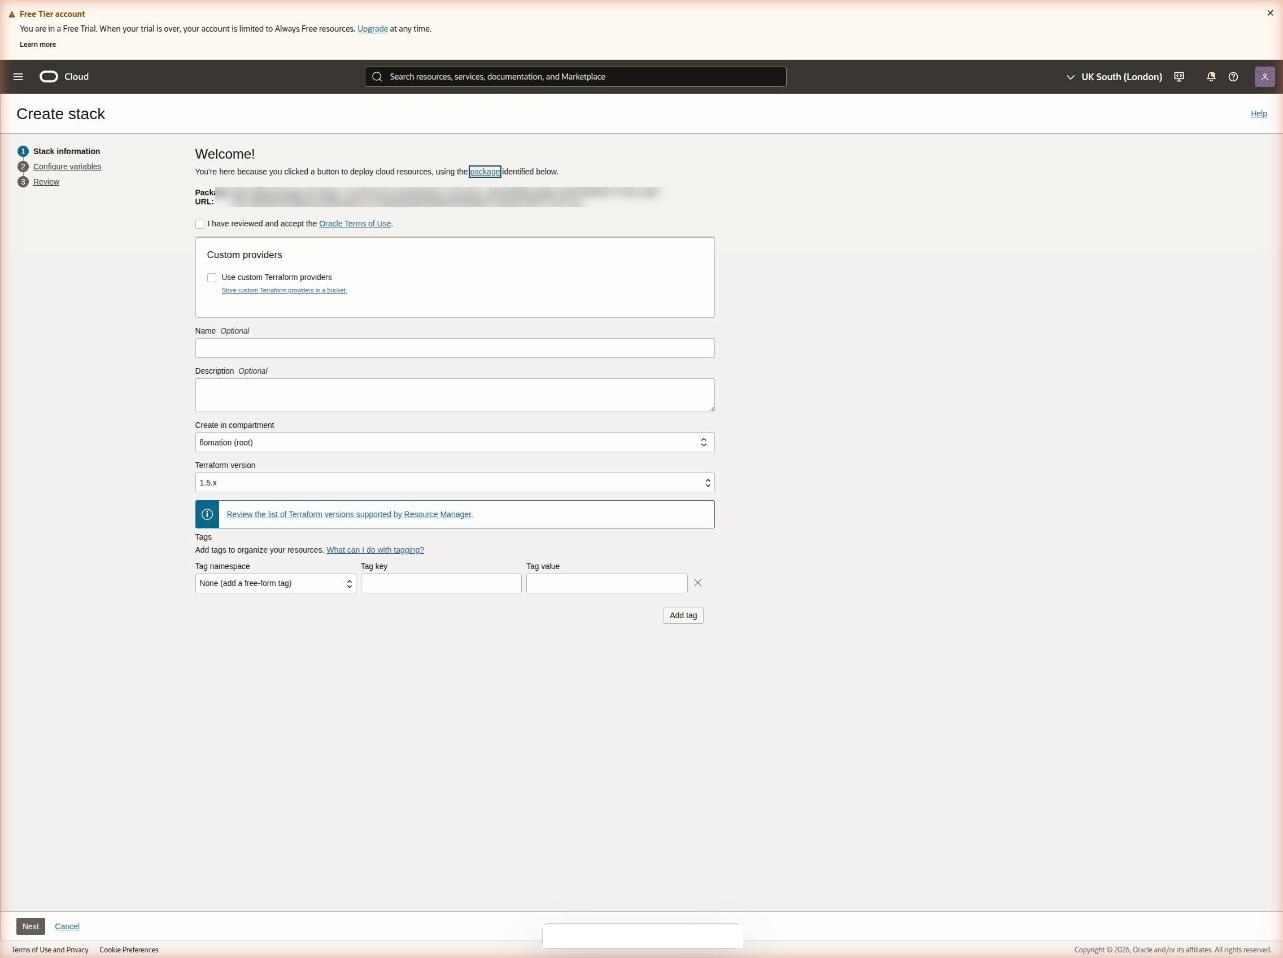
Stack information -
Confirm the variables
On Configure variables, the compartment, region and scope are already filled in. Adjust the compartment or scope if you want to narrow what Flomation can manage, then click Next.
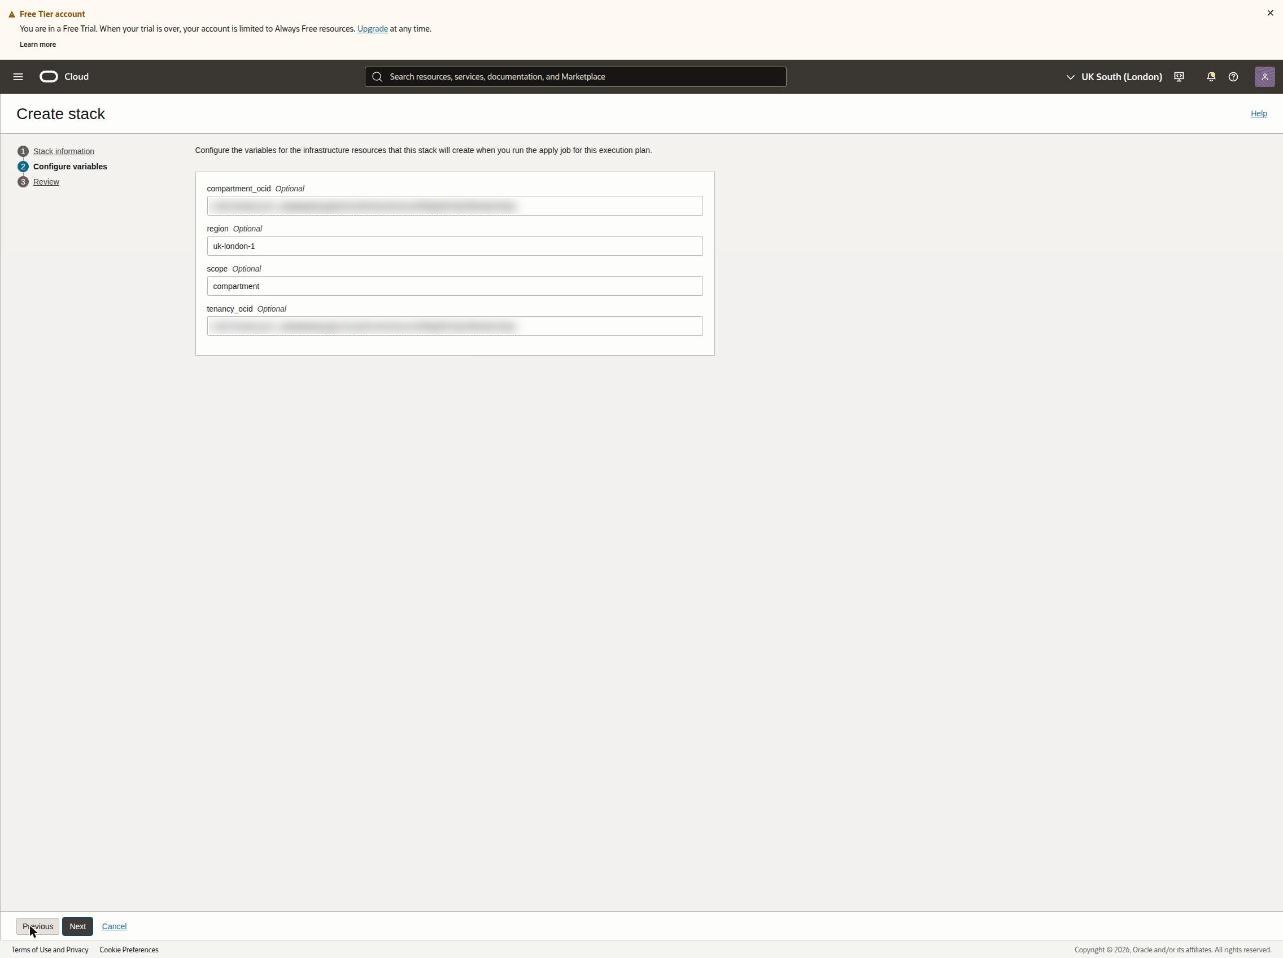
Configure variables -
Run the stack
On Review, make sure “Run apply” is ticked, then click Create.
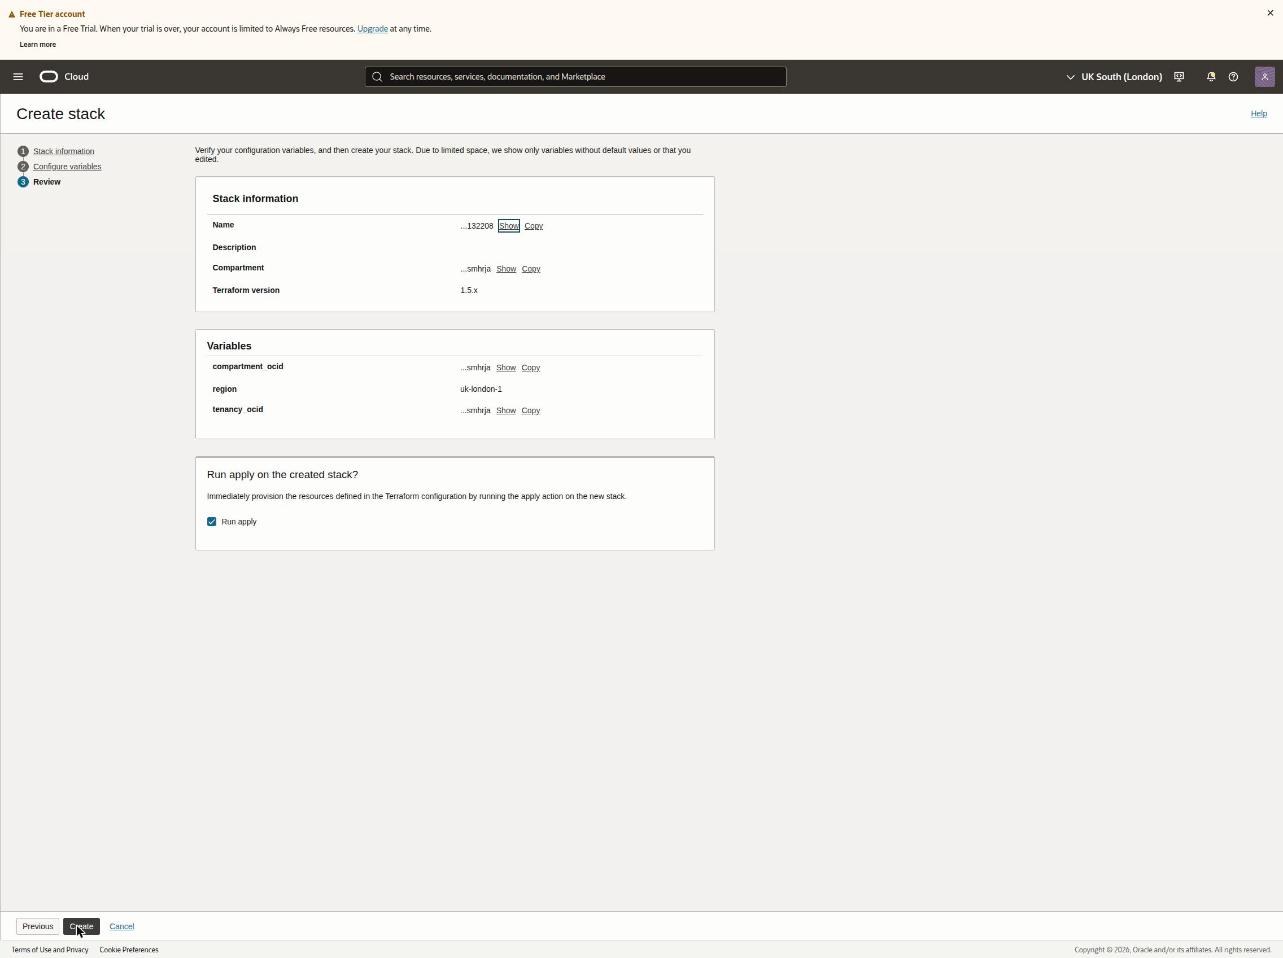
Review -
Wait for Succeeded
The apply job runs for about a minute and reaches Succeeded. It has created a dedicated user, group, policy and API key in your tenancy.
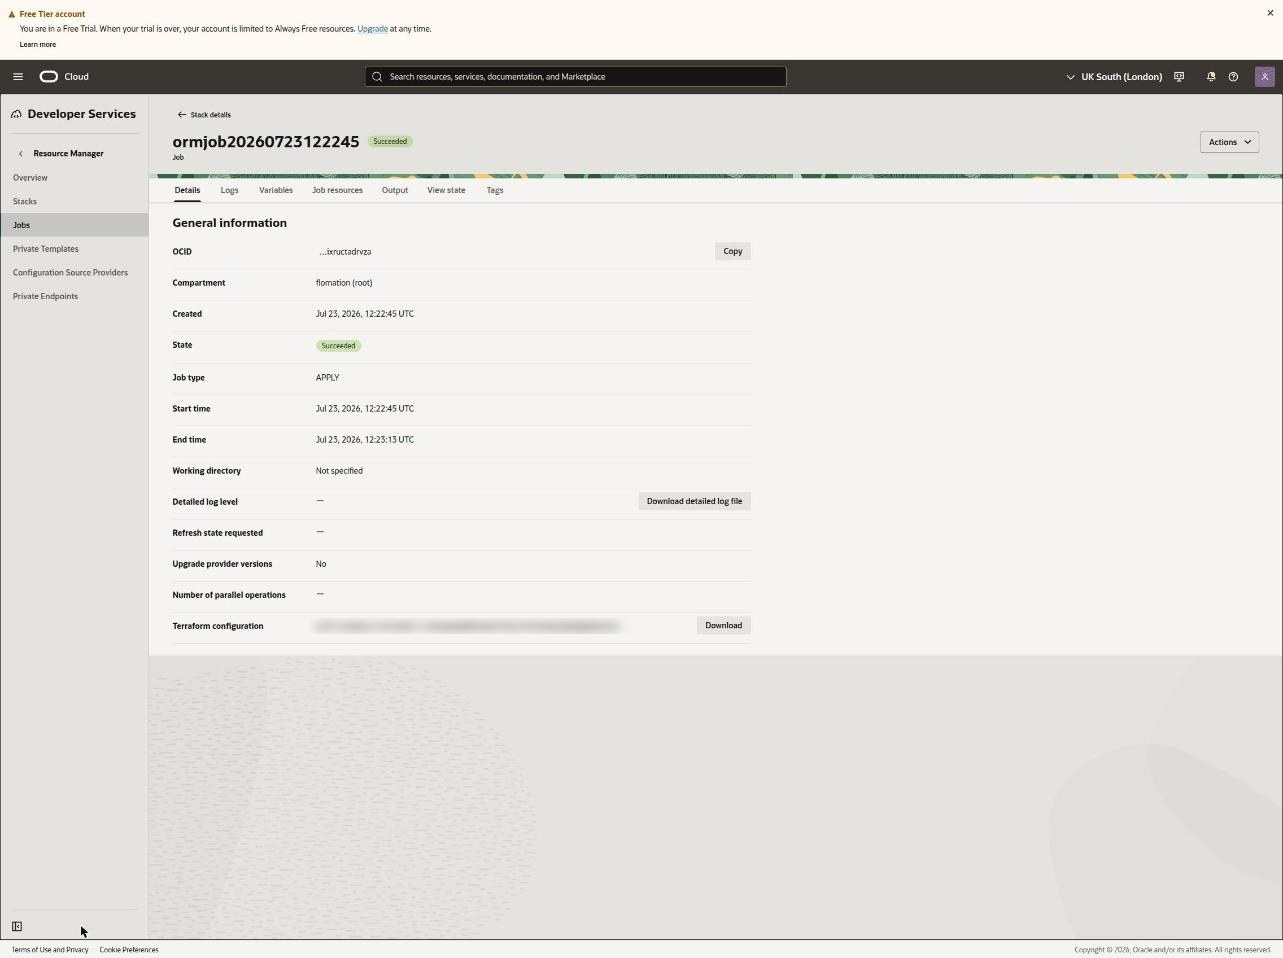
Apply job ▸ Succeeded
03Finish & test in Flomation
Hand the new user’s OCID back to Flomation, connect, and confirm it works. That’s the whole setup.
-
Copy the user OCID
Open the Outputs tab and copy the value of
flomation_user_ocid.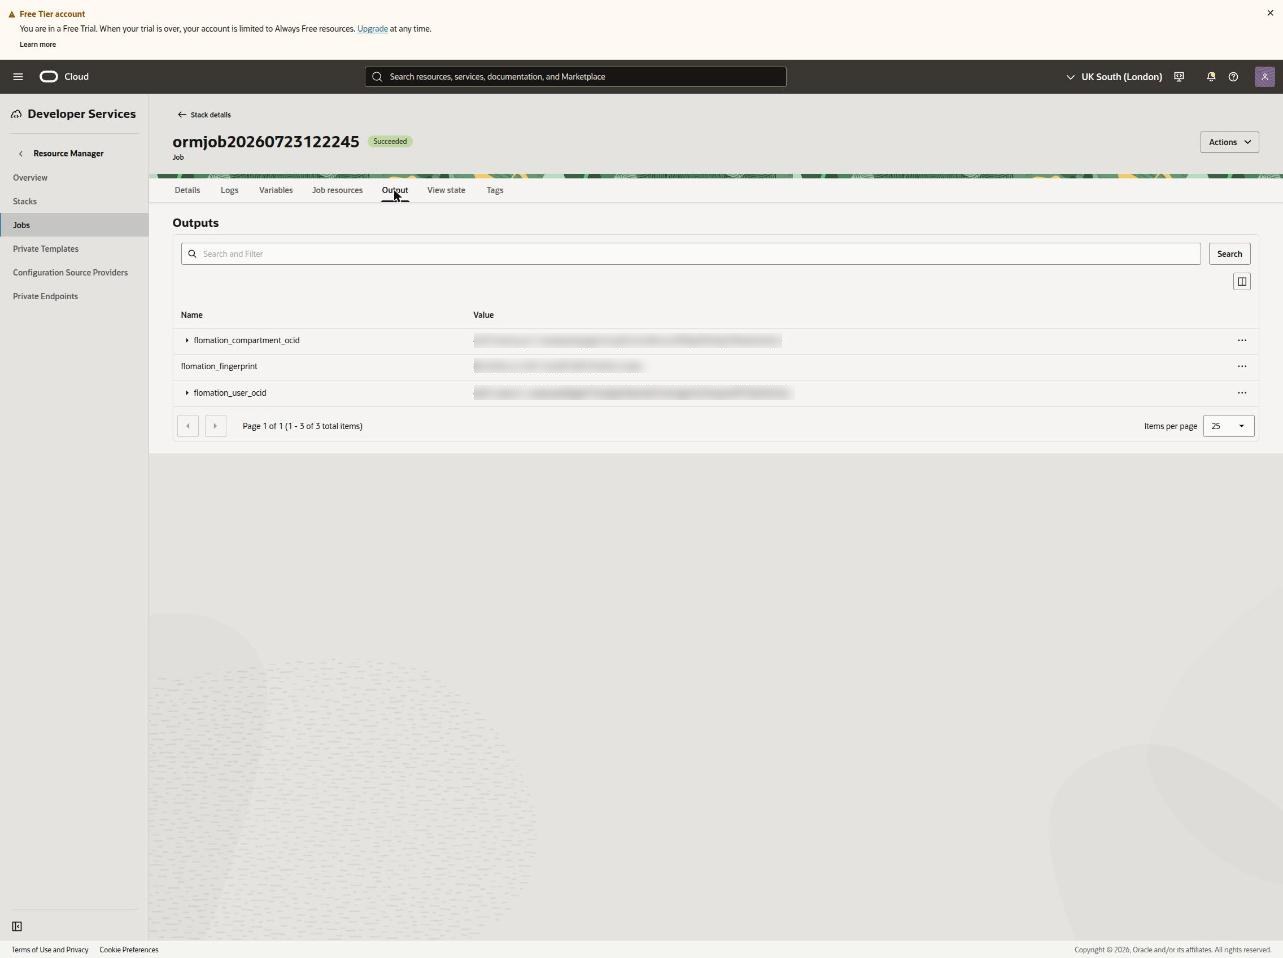
Application information ▸ Outputs -
Paste it back into Flomation
Back in Flomation, paste that value into User OCID and click Connect.
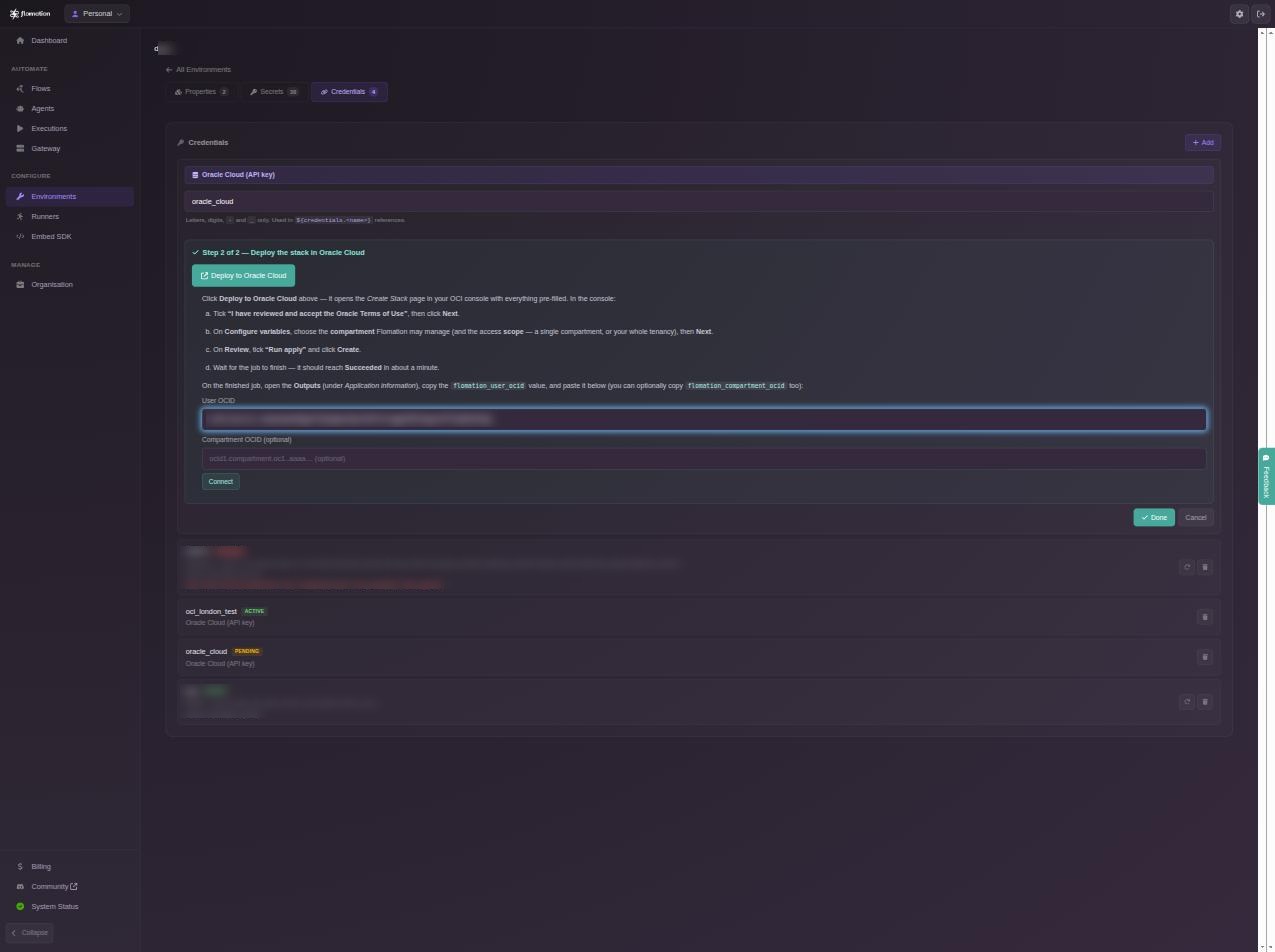
User OCID ▸ Connect -
Test the connection
Click Test connection. A brand-new key can take up to ~90 seconds to activate, so if it isn’t ready yet just try again — you’ll see Connection confirmed.
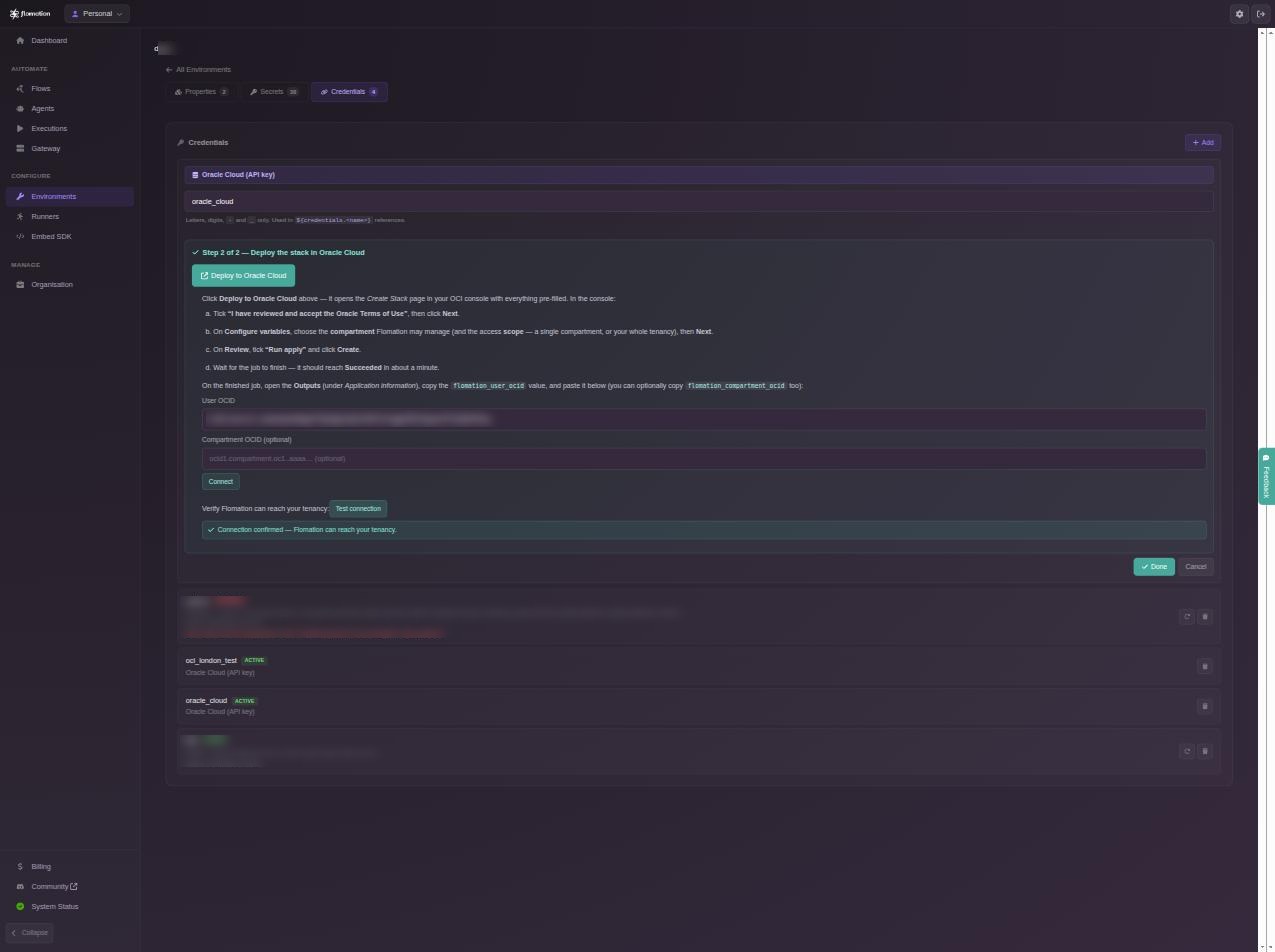
Connection confirmed -
Done
The connection now shows Active. On any Oracle Cloud node, pick it under Connect Oracle Cloud — no keys to paste, ever again.
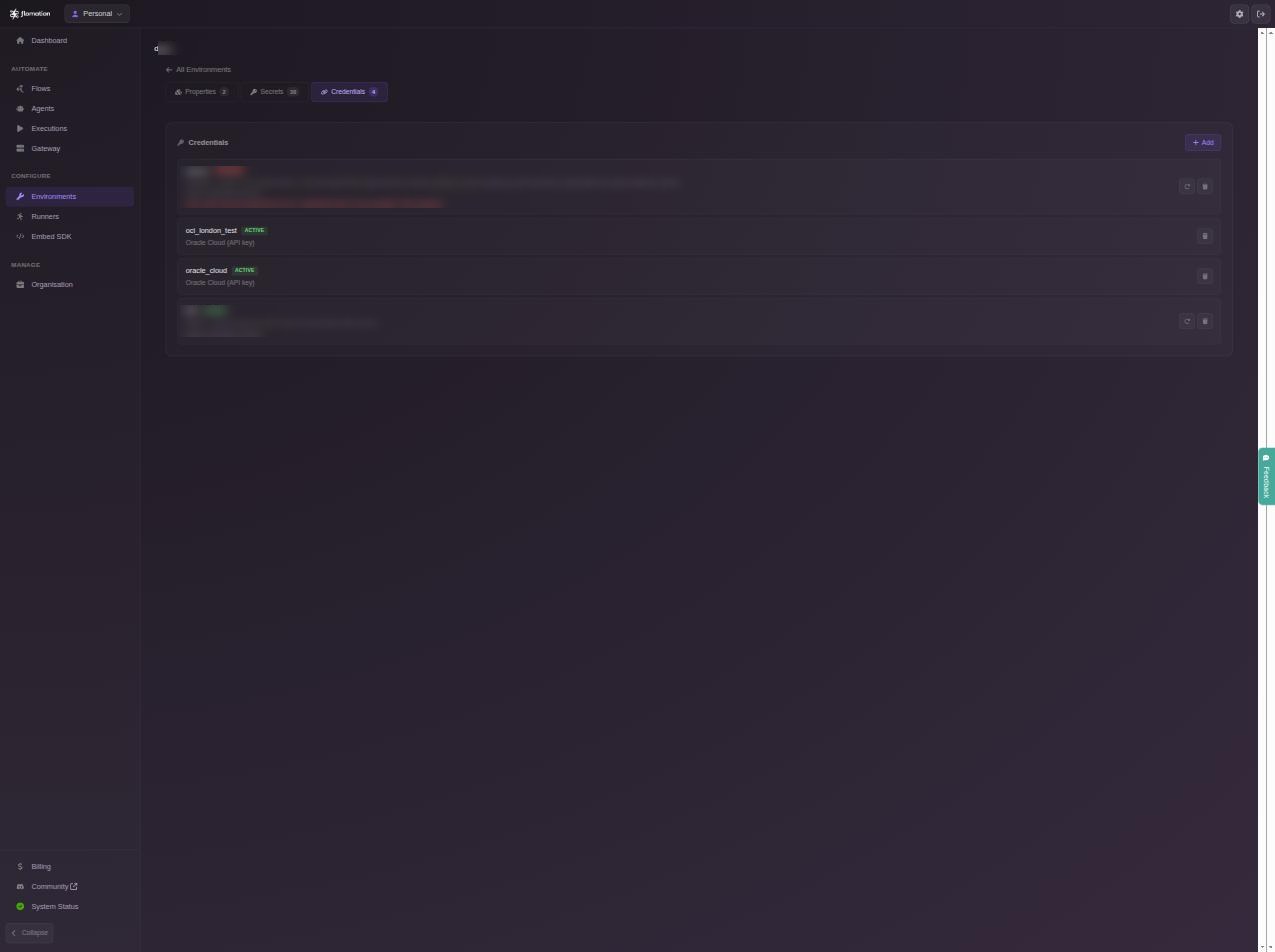
Connection ▸ Active
04Good to know
A few things worth keeping in mind after you’ve connected.
- Scope is yours to set. On the Configure variables step you can point the policy at a single compartment (the default) or your whole tenancy. Narrower is safer; widen it only if a flow needs it.
- Activation isn’t instant. A freshly created API key takes up to ~90 seconds to propagate inside OCI. If Test connection fails the first time, wait a moment and try again.
- Revoking is one click on your side. Delete the connection in Flomation, or delete the automation user in OCI — either cuts access immediately.
- The stack cleans up after itself. The deploy artefact is removed once the connection is live, so nothing is left sitting in your object storage.